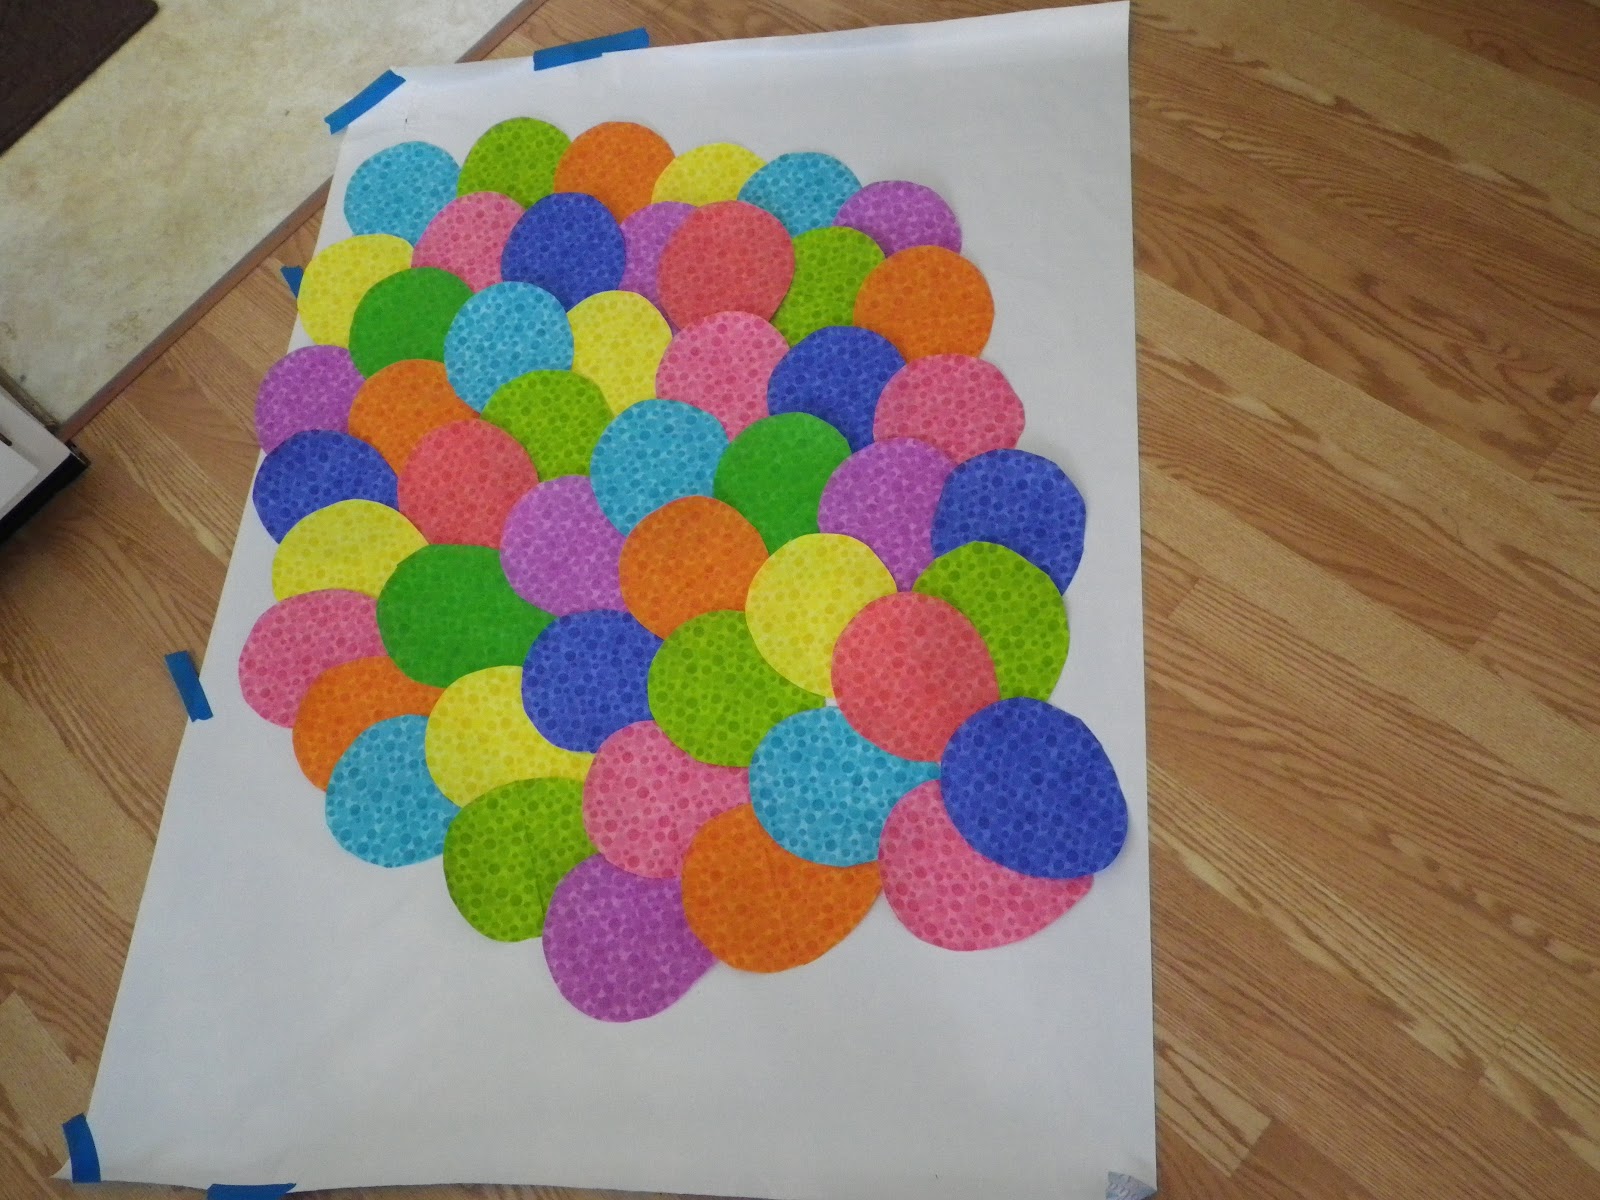
I've always wanted a "Disney" room in our house and there are touches of Disney in all rooms (a stuffed animal on the chair, photo from Disney...). I found these blue and white lamps at Christmas Tree Shoppe that inspired me to create an Up room in our peach bedroom. At first I wasn't sure how I would accomplish making balloons on the wall how I envisioned them. Searching for artwork to make for my sister Jen for her nursery I came across iron fabric on your walls. So I headed to the craft store and picked up the materials.
Fusible interfacing (iron it on and then peel the paper backing and then iron a second time to make it stick to the wall...or other fabric), fun and light weight fabric in a pattern (or patterns if you want to mix/match). I picked up 2 rolls of fat 3/8ths fabric plus 6 yards of interfacing (I did not use all the 3/8ths). Then I traced a balloon shaped template on my interfacing and cut them out.
I grabbed a piece of wrapping paper and taped it on the wall so that I could draw a basic outline of my balloons and get an idea how much space I wanted them to take up. Then I set to work laying out the balloons and arranging them to look good.
They of course all slid and moved when I went to move it. **If you plan to do this I would suggest you lay it out upside down and have an additional piece of fabric and interfacing so that you can iron all the pieces together and then iron the whole piece on the wall**
After they all slide I laid them out on the floor for a second time. I taped them together with clear mailing tape and attempted to pick it up and tape it to the wall. Huge failure on my part and frustrated I leave the room for an hour after yelling at Luke (who isn't even in the room). He tells me I'll figure it out and it will be awesome. According to him I have good ideas. This time I laid a piece of wax paper over them and traced the shapes/colors. There is no attempt at moving the whole thing.
Loving that it looks more like a hot air balloon now. I then taped the wax paper to the wall and traced the basic outline on the wall as a guide. I taped the wax paper one on the nearby wall to reference and hold up as needed to help in placement/moving of the pieces. I move the cutouts piece by piece and tape as I go.
I used painters tape to put it on the wall. Then came the tricky part...ironing this to the wall. I started at the top since I knew as I ironed they would "flatten" slightly from their current state. I held a few pieces with their tape missing and just tapped the tip of the iron to get them "stuck enough" for me to remove some more tape from a nearby piece. This is the part that took the longest, removing the tape and ironing. It shifted slightly in shape as this happened, but overall I am happy with it. The difficulty of moving the tape as you go is why I suggest an extra piece of fabric and fusible interfacing so you can move it as a solid unit. Probably not necessary if your pieces aren't "linked."
Luke decided he liked it up and down instead of at a slight angle on the wall, so that's what we have. Here is the finished product on the wall... and you can see my Up lamps that inspired this whole project. Still deciding on if and how I want to do the strings for the balloons.
Showing posts with label craft. Show all posts
Monday, March 25, 2013
Friday, March 22, 2013
experimenting with the iron
While playing on pinterest to find ideas for things I could make for Jen's baby shower I came across this nursery with fabric letters on the wall (I was looking for a nice art project to make for her walls). FYI I did find a project to make Jen but this isn't it. I had an idea in my head (yup, that's where ideas happen) and figured this could work since I haven't been able to find anything else that will come close to what I am envisioning without a lot of artistic skills on my part.
I will say I was a little skeptical about this actually working but I figured I'd give it a try anyhow and went to the craft store. I picked up some quilting fabric (it has to be thin/light) and some double sided fusible interfacing (like 2 sided tape for fabric).
You iron on the interfacing, peel off the back and then iron the fabric to the wall. I tested this out in the closet since I wouldn't notice the wall damage behind where I hang up our ironing board if it failed miserably. So above is the heart I cut out and ironed on the wall. But would it peel off without damaging the wall?
It did! I kind of had to pick a little spot quite a bit with my nails and then I could start "rolling" it off. Easy to remove but not so easy that it is going to fall off at the slightest thing. So excited about the project now and I will hopefully get to work on it over the weekend. I could have probably ironed the fabric onto the wall a bit more but it stuck no problem. I did put a washcloth over the shape so that the iron wouldn't directly touch the wall. Here are the colors I have for my little project that is Manfriend approved :)
I will say I was a little skeptical about this actually working but I figured I'd give it a try anyhow and went to the craft store. I picked up some quilting fabric (it has to be thin/light) and some double sided fusible interfacing (like 2 sided tape for fabric).
You iron on the interfacing, peel off the back and then iron the fabric to the wall. I tested this out in the closet since I wouldn't notice the wall damage behind where I hang up our ironing board if it failed miserably. So above is the heart I cut out and ironed on the wall. But would it peel off without damaging the wall?
It did! I kind of had to pick a little spot quite a bit with my nails and then I could start "rolling" it off. Easy to remove but not so easy that it is going to fall off at the slightest thing. So excited about the project now and I will hopefully get to work on it over the weekend. I could have probably ironed the fabric onto the wall a bit more but it stuck no problem. I did put a washcloth over the shape so that the iron wouldn't directly touch the wall. Here are the colors I have for my little project that is Manfriend approved :)
Monday, July 16, 2012
My Dress... well the idea
| sorry it's blurry |
Mom and I went to pick out the fabric. Dumbo will be on purple, yellow and green panels with all of the in between panels black/white dots. At the bottom we will have a wide yellow rick rack (squiggly ribbon) and then small black/white dots. I am going to just wear a wide strap tank top with the skirt part and create cap sleeves with red/yellow fabric to look like Dumbo's collar.
Thursday, June 14, 2012
Door Decoration
Subscribe to:
Posts (Atom)